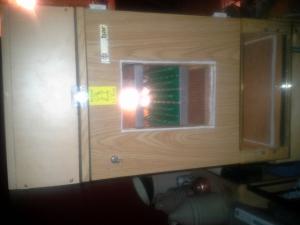
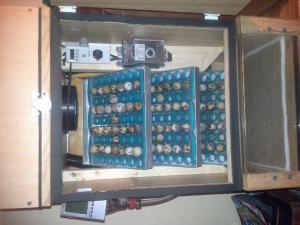
The hatching tray and window are made from one of those old usless bubbling light things... worked perfect as a double pane window. just cut it nice and slow with a proper plastic jigsaw blade.
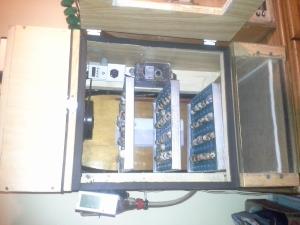
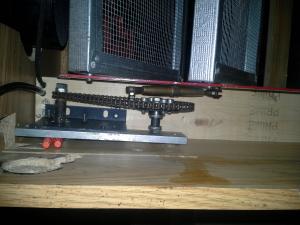
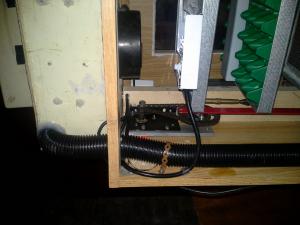
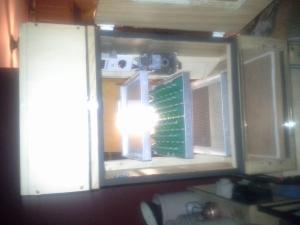
the turner, gears and motor are mounted to an aluminum 2"x1/2" flat stock and turns by a chain, my other incubator uses a belt and it slips under a lot of weight. the reason for the gears is to lower the gear ratio and only turn half way in the course of a minute. well I just found out this timer is capable of programming seconds!!! grrr! the turner motor is from a bbq rotisserie but princess auto sells just the motor. the turner actually takes 3 minutes and 15 seconds to tilt half way, super slow. the egg trays are made from steel studs and there all connected with a piece of flat steel. the trick to making the trays move properly is connecting the push rod exactly 1/4 of the length of the tray. its really nice having a push rod that is adjustable, im not sure exactly what thats called but it is incredibly handy for fine tuning.
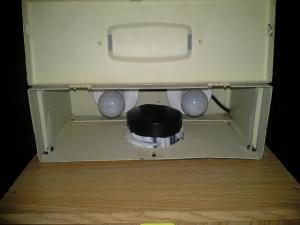
the heating is done with 2 GLOBE 100watt rough use incandescent light bulbs.
*****I must stress for anyone who dosent all ready know that most rough use light bulbs have teflon on the bulb to help resist breaking, I contacted GLOBE and there is no coating on there bulbs, just extra thick glass and 5 filaments inside. they are available at princess auto. teflon when heated will kill poultry and cage birds.*****
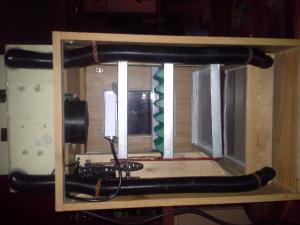
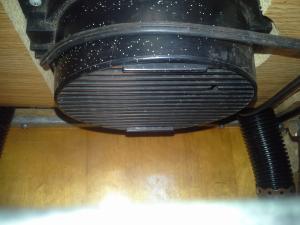
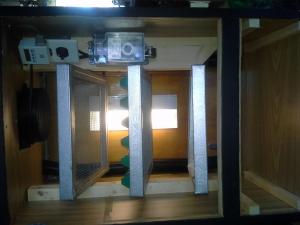
the bulbs are mounted inside an old mini metal filling cabinet, there is a fairly strong fan blowing into the box. there are 2 hoses on each side of the box blowing straight to the bottom of the box and kind of blow out on an angle directly to the middle of the cabinet. I believe this is enough to evenly distribute the heat throughout the cabinet. I did not add any additional fans in this one.
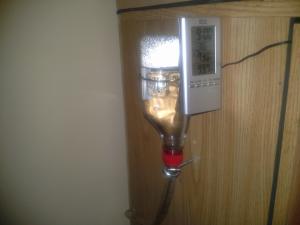
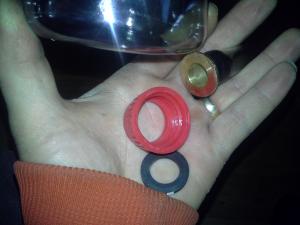
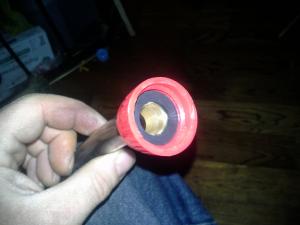
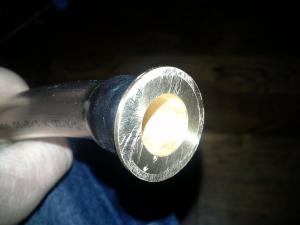
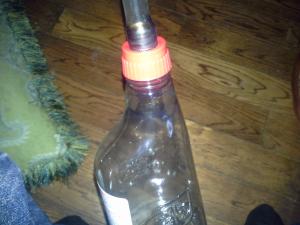
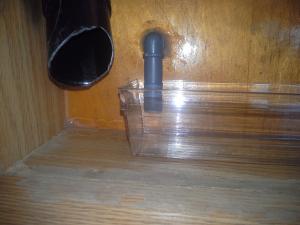
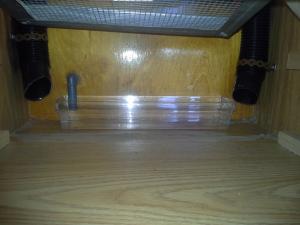
the humidity is automatically controlled by gravity with a hose running from a hard spray bottle from home hardware, they dont squish under the suction created. one flaw with this setup though, I used a 90* elbow for looks and the meniscus will not let the water flow automatically! I should have known this because I did the same thing on the first incubator, just use the hose alone. the fitting that connects the hose to the water bottle lid needs to be perfect, its a connection for copper to plastic waterlines, i cut the cooper side off with a hacksaw and filed it down perfectly smooth and flat. a standard water hose washer goes in between the bottle and the fitting creating a perfect seal. the hose allows one to fill up the bottle without spilling anything and also allows you to drain the hose back into the bottle if your humidity gets to high. of course the surface area of the water tray dictates the humidity level. that water dish in the picture would be perfect for hatching but not for incubating... to high of humidity.
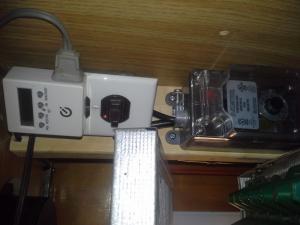
the thermostat is from princess auto, I used it because I already had it on hand, I could have used a digital one but im going to use them on a hatcher and brooder instead. that build is next.
all wiring is done properly and everything is grounded properly, electricity is dangerous and must be done right. if you dont know how to wire things up speak with an electrician. the switch controls the power to everything, the outlet is for the timer that controls the turner. and this timer rocks I hope it lasts because it controls seconds. I bought it from princess auto. the light on the back helps to see inside but is really not necessary, I mostly just leave it off.
I built a box on hinges to cover the metal heating box on the top and help insulate it. it latches down and is sealed up with weather stripping. the door and window is sealed up also with weather stripping.
one important step on this build was put the back of the incubator on last after everything is complete. i didnt do that on the last build and i gotta tell ya it sucked... a real pita to try and build at the back from the front.
90% of the material used is fake wood. i dont like fake wood but this used to be a bar fridge so I just went with it and I have to tell you it insulates very well. I can put my hand on my other incubator and its warm. when I put my hand on this one its room temperature. as much as I dont like this material I think i will use it again. just make sure it gets sealed up well with silicone or varathane, I used silicone. I also drilled 2 holes one in each side to allow the incubator to breath.
soo hmmmm I think thats about it? pics I guess right? LOL
:running-chicken:
- 20150228_1952191971520610.jpg (6.97 KiB) Viewed 13015 times

- 20150301_2321091929493310.jpg (12.34 KiB) Viewed 13015 times
- 20150301_2322441971520610.jpg (13.79 KiB) Viewed 13015 times
- 20150302_2059191929493310.jpg (6.85 KiB) Viewed 13015 times
- 20150224_204658914125403.jpg (12.53 KiB) Viewed 13015 times
- 20150225_220932-2063313894.jpg (11.33 KiB) Viewed 13015 times
- 20150225_100210469100327.jpg (10.62 KiB) Viewed 13015 times

- 20150225_220940801431382.jpg (11.31 KiB) Viewed 13015 times
- 20150225_220951269379207.jpg (8 KiB) Viewed 13015 times
- 20150226_174103-1338659922.jpg (9.77 KiB) Viewed 13015 times
- 20150226_174127-2143559579.jpg (8.62 KiB) Viewed 13015 times
- 20150226_174127-2143559579.jpg (8.62 KiB) Viewed 13015 times
- 20150226_174024304253081.jpg (7.58 KiB) Viewed 13015 times
- 20150226_174149173244037.jpg (11.83 KiB) Viewed 13015 times
- 20150227_121000-1244266867.jpg (11.38 KiB) Viewed 13015 times
- 20150227_121006-90381901.jpg (9.88 KiB) Viewed 13015 times
- 20150227_115758177258159.jpg (9.59 KiB) Viewed 13015 times
- 20150227_115837211707466.jpg (10.24 KiB) Viewed 13015 times
- 20150227_1157521359685181.jpg (9.25 KiB) Viewed 13015 times
- 20150228_233318-712938794.jpg (9.71 KiB) Viewed 13015 times
- 20150228_195121346684315.jpg (9.02 KiB) Viewed 13015 times
- 20150228_1951571521308517.jpg (8.02 KiB) Viewed 13015 times